Tutorial Lesson: Arranging plants
In this lesson you will import some flowers from another plant file, arrange flowers into a bouquet, and export some plants.
Open the file from the previous lesson
If you haven’t already done the previous tutorial lesson3MLEKN>main, open the file called Tutorial Lesson – Changing Parameters.pla in your PlantStudio directory. If you already did the previous lesson, open the file you made now if it is not already open. In either case you should see three Black-eyed Susans in the drawing area.
Import some plants
Let’s bring in some other plants to add some variety to our bouquet.
1. Choose Move > Plant Mover from the File menu.
[If a window appears asking you if you want to save your file before opening the mover, click No. The list of plants on the left side of the plant mover might be wrong, but it doesn’t matter because we won’t be using it.]
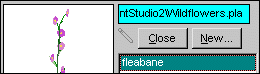
2. The plant mover will appear with your file on the left side. Click Open on the right side of the plant mover and choose the file Wildflowers.pla in the PlantStudio directory. The right-side list will fill in with the plants in the wildflowers file.
3. Click on fleabane. Notice that you can see the fleabane plant in the preview area in the middle of the window.
4. Hold down the Control key and click on wild pink. Those two names should be selected in the list on the right.
5. Click Copy. This will copy the fleabane and wild pink plants to PlantStudio’s internal clipboard.
6. Now click Quit.
[If a window appears asking if you want to save changes to either file, click No.]
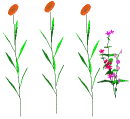
7. Back in the main window, choose Paste from the Edit menu. The two plants you copied from the other file will appear.
8. Paste again to get another two plants.
Resize and align the plants
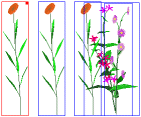
1. Now let’s resize the plants so they are all the same height. First, select all the plants in the window – choose Select All from the Layout menu, or type Control-A.
2. Click on the Arrangement tab, then click the Equal Height button. The plants will resize so that they are all the same size.
3. Now click the Align bottom  button. The plants will move so that their bottoms are at the same place in the window.
Make the bouquet
Now for our bouquet.
1. Choose Align > Make into Bouquet from the Layout menu. All your plants will collapse into one spot.
[If all the plants don’t move, you might have lost your selection of all plants. Type Control-A again to select all the plants.]
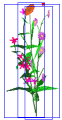
2. Drag the whole bouquet into the center of the picture, if it is not there already.
3. Let’s get rid of those rectangles so we can see what we are doing. Turn off the Draw Rectangles > Around Selected Plants and Draw Rectangles > Around All Plants options in the Options menu.
Make it more unique
1. Your bouquet probably looks pretty boring at this point, because you have no random variation between the plants. But before we randomize the plants, let’s give them a little more room to move around.
2. Click on the Parameters tab, then choose the parameter section General parameters.
[If you have trouble with the Parameters panel, make a quick visit to the tutorial lesson Changing parameters3MLEKN.]
3. In the very first group of the General parameters there is a parameter called Random sway in drawing angles. That parameter governs how much plants vary from one to another. If we increase that number for all of the plants in our bouquet, we’ll get a more interesting mix. Increase the number – not much – just to about five percent.
[Make sure that all of the plants stay selected, or you won’t change the parameter on all the plants. Since we are not using selection rectangles, make sure that all the names in the plant list stay highlighted.]
4. Now let’s do some randomizing. Keeping all the plants selected, type Control-R to randomize the plant parameters. Do this several times until you have a bouquet you like.
Save your file
Now save your plant file. It’s a good idea to save your file before you copy a picture to the clipboard and open another program, because you might be stressing the memory capabilities of your computer. Choose Save as from the File menu, choose a directory, and type in My tutorial – Arranging plants.pla.
Export
When you are satisfied with your bouquet, you are ready to export. You have a choice here: you can try copying to the clipboard, or you can try exporting the plants to a 3D format (or you can do both). Choose one or both of the sections below.
Copy the picture to the clipboard
1. Choose the Draw Using > Solids option in the Options menu. It’s important to remember that PlantStudio always uses the current drawing option when you save, copy or print a 2D picture.
2. Choose Copy Picture from the Edit menu. The picture export options window will appear.
3. Under the Draw which plants? section in the upper left, click the all radio button.
4. Set the Color depth choice to whatever you want to use for your drawing program. Most drawing programs prefer 24-bit color with 16 million colors, so that is a good choice.
5. Set the Resolution at whatever resolution your printer can handle. Typically this is 300 pixels per inch (same as dots per inch in this case). If you don’t have a lot of free memory, you might want to set the resolution smaller, to between 100 and 200 pixels per inch. If you are planning to use the picture for display on the screen (on the web, for example) you can set the resolution lower.
6. Click Copy.
7. Now open your drawing program and choose Paste from its Edit menu. You should see your bouquet there in all its glory. Now you can play with the picture using your graphics program as you normally do.
Export the plant models to a 3D format file
1. Choose Export, and then a 3D file format, from the File menu. The export options window will appear.
2. Some of the export options are the same for all 3D formats, and some are different for each. Look at the help section on 3D exportExporting_3D_models_in_general to make your choices.
3. Click Save, type in a file name, then click OK.
4. Open your 3D program and import the plant models. If you have problems importing the type of format you chose, read our tipsExporting_3D_models_in_general about doing this.
Move on to Breeding new varieties1U0G0VA>main
Go to the Tutorial IndexTutorial>main
Read more about:
Using the plant moverUsing_the_plant_mover>main
Moving and arranging plantsMoving_plants>main
Randomizing plantsRandomizing_plants>main
Copying picturesCopying_pictures>main
Created with the Personal Edition of HelpNDoc: Produce online help for Qt applications