Tutorial Lesson: Posing
In this lesson you’ll learn how to use posing to give a plant more individual characteristics by moving and changing its individual parts. You’ll take a plain Black-eyed Susan and give it some interesting character.
Open a file to work with
This tutorial lesson doesn’t have to be done after the previous lesson, so you can open any of the tutorial files you have saved. If you haven’t done any tutorial lessons, open the file called Tutorial Lesson – Changing Parameters.pla in your PlantStudio directory.
Get ready to pose
First let’s get things ready so we’ll have an easier time posing.
1. Select the plant Black-eyed Susan.
2. Go up to the toolbar and click on the Drawing area on side  button, then on the Show only focused plant
  button. Your plant will appear large and on the left side.
3. Now drag the splitter bar  over to the right until there is a good amount of space to the right of your plant. Make the window wider if you need to. We’ll need that space in a minute.
Pose the second internode
1. Now click on the Posing selection cursor mode  button in the toolbar. The Posing panel will automatically come to the front, and the cursor (in the drawing area) will look like a little cross-hair with a “P”.
2. Move your cursor to the bottom of the Black-eyed Susan, to the next-to-the-bottom internode, which should be plant part number 5. Watch for the hint that shows you which plant part you are pointing to. It should look like this:
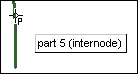
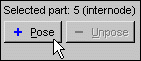
3. When you see that you’ve got the right internode, click on it. The Posing panel will react by showing the internode number (5) in the area under where it says Posed parts. When you see that, click the Pose button below it.
4. A whole bunch of check boxes and things will appear in the Posing panel, and the internode will turn red. Now check the box labeled Add an extra rotation to this part of, then move the Y rotation number up or down by clicking on the little arrows next to it, like this:

5. Watch your red internode on the plant to see which way you should turn the Y rotation. It might be different depending on how the plant was rotated. You might even have to change the Z rotation instead. When you’re done the plant should look something like this:

Pose more internodes
Okay, we’re moving. Now that you’ve seen how to rotate an internode, move up the plant stem doing the same thing to each internode.
▪ For each internode, click on the stem (not the leaf stalks), look to see that the internode number shows in the Posing panel, click Pose, then enter a rotation and watch the plant move. The plant should get progressively more arched over.

▪ If you get bored, just pose every other internode.
▪ Don’t worry too much about which rotation dimension you are using (X, Y or Z); just try them and do what works.
▪ Don’t pose the leaves, just pose the internodes. If an internode is directly on top of a leaf, PlantStudio will pick up the leaf, not the internode (because 3D objects are considered first). If you can’t get at an internode because a leaf is in the way, find a part of the internode that is not on top of the leaf. If there is no such part, switch to Rotate mode  , rotate the plant so the internode is not on top of a leaf, then switch back to Posing selection mode and click on the internode.
▪ If the plant arches out of view, either click Scale to Fit or switch to Select/drag  mode, drag the plant, and switch back to Posing selection mode.
▪ When you get up to the inflorescence stalk, stop.
Pose the inflorescence
For the inflorescence, let’s do something more interesting. Select the inflorescence in the same way you did the internodes, by clicking on it, and then click the Pose button. Now change its rotation in more than one dimension. Use the three dimensions together to make the flower head sort of turn around and look at you, like this:
Correct the jerky angles
At this point the inflorescence will probably look too jointy, like it does here. You’ll find that when you pose plants you will often need to increase the fineness of the stem curving. Click on the Parameters tab, then find the parameter [General parameters: Number of segments to draw to create curved line] and increase it from three to six or eight. Your plant should look much better now.

[While doing this, if you change any parameter that impact’s the plants growth, you will lose all your posing changes. If that happens, don’t worry – just undo the change and your posing changes will come back.]
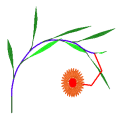
Pose the leaves
If you like, play with posing the leaves, giving them their own rotations and sizes, to give the plant an even more interesting character. Make the plant look more like this:

Save your file
If you want to keep your posed plant, save the plant file. Choose Save as from the File menu, choose a directory, and type in My tutorial – Posing.pla. You can also look at the file Tutorial Lesson – Posing.pla to see what the end result of the lesson is like.
Move on to Changing a 3D object1_D9_5K
Go to the Tutorial IndexTutorial>main
Read more about:
PosingPosing_plants
Created with the Personal Edition of HelpNDoc: News and information about help authoring tools and software